
Layed down the first set of foam strips today! I decided to experiment with the width and started off with about a 15" wide piece. This seemed a little too wide for the middle section. I finally decided that around 10" worked good. Here's what seemed to work so far:
1) Install deck flange mold plate. Double-check that it is straight.
2) Install battens every 2-4 inches.
3) Run packaging tape along lengt
h of battens.
4) Install the keel foam after installing all foam strips.
5) Start around form frame six.
6) Measure distance from deck flange mold plate to keel batten. Using a (metric) flat back tape measure works good for this.
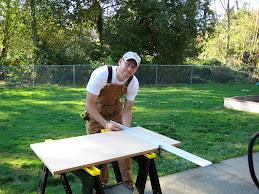
7) Mark this distance on half-sheet (4'x4'). Cut off piece using table saw.
8) Divide and cut remaining sheet equally so you have 8-10" strips. I get five at 9.5 inches.
9) Cut extra piece (see #7) in half. I get two at 8-9 inches wide. Eventually, I cut six of these in half to use on last four feet of stern. Very little wastage this way.
10) Temporarily lay down strip near frame 6. Make sure that length is just short of keel batten.
11) Mark placement of foam and pre-drill holes from top of battens about one inch from sides. With a 10" wide plank, I found two screws per batten usually worked fine.
12) Screws - I am using 1" panhead scre
ws from Tacoma Screw, here in Seattle. #8 x 1" ZINC RWH PHIL STEEL K-LATH NEEDLE POINT 075-K14-1 for those that are interested.
13) I made up some clamping "bars" using 3/4 inch plywood (experimental version below). They are 2x20 with a 2x3 3/8" plywood piece glued to one end. Slide to one edge of the new plank and then clamp down just on the other side, as shown below. This works well if you are planking by yourself.

12) Clamp down foam using three plywood bars and quick clamps. One bar near the deck flange mold plate, and two bars on the curved part closer to the keel.
13) Starting at the deck flange mold plate, attach screws through the battens into the foam from underneath. I found kneeling/laying on a foam sleeping pad worked well. If bar clamp is not on a specific batten, make sure you are pressing down on the top of the foam with your hand. This seats the foam properly and makes sure the screws are in as far as possible. Using two drills works fastest. I set up my large cordless with the drill bit, and used my pocket drill to drive in the screws. Having the smaller drill/driver (Bosch PS20-2) is really nice while working underneath the battens.
14) Thermoforming will help in the curved areas. I used a digital heat gun with multiple fan/heat settings and set that up underneath the keel area battens with the heat directed upwards. This works fine as long as you don't get the foam too hot (no scorching), and you don't leave it in one area for too long.


Andrew and I came up with this solution for the bow battens.


 I cut a four foot section of foam and clamped that to the keel batten. Then I took a Japanese-style pull saw (with a thin, flexible blade), and using the keel foam as a guide, cut the proper angle on the foam planks.
 After all the planks were cut, I slipped in the keel foam so that it was flush with the top of the keel batten. The foam was about 2 inches high, and I cut back where the form frames interfered on the bottom using a Stanley Surform pocket plane. By the way, you can replace the Surform blade with a Micoplane blade for better/faster results. I finished up by screwing the foam keel in from the back side of the keel batten.
 Decided to try using MDF as battens. I ripped a bunch of 12 foot 1x6's into 1" strips and put them down every 3-4 inches. I think they came together pretty nicely in the stern. The bow gave me a little trouble, but I think I came up with a good solution.
 The frames are temporarily held in place using scrap wood until I can attach the battens.


